Servers and licences
Registering a server issues a licence key bound to that machine’s IP address. The Engine uses that key to prove which account it belongs to.
1 · Add the server
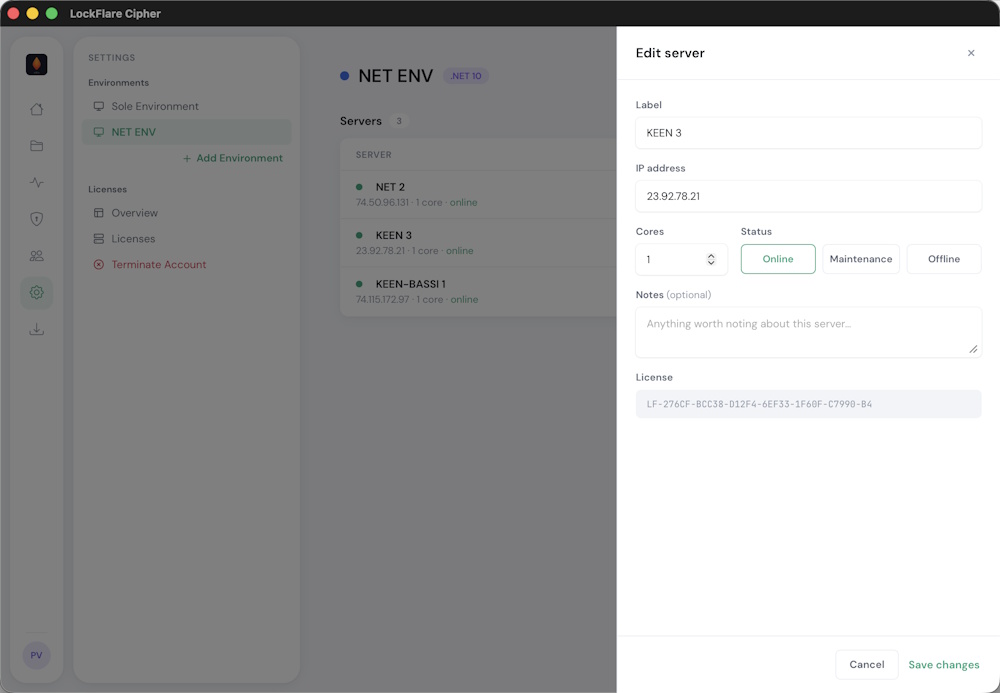
Label, public IP address and core allocation. The label is for you; the IP is what the licence binds to.
| Field | What it is |
|---|---|
| Label | A name you will recognise in Monitoring. Not used by the Engine. |
| IP address | The server’s public IP. The licence is bound to it — a typo produces a machine that never comes online. |
| Cores | How many CPU cores to allocate here, counted against your plan. |
2 · Copy the licence key
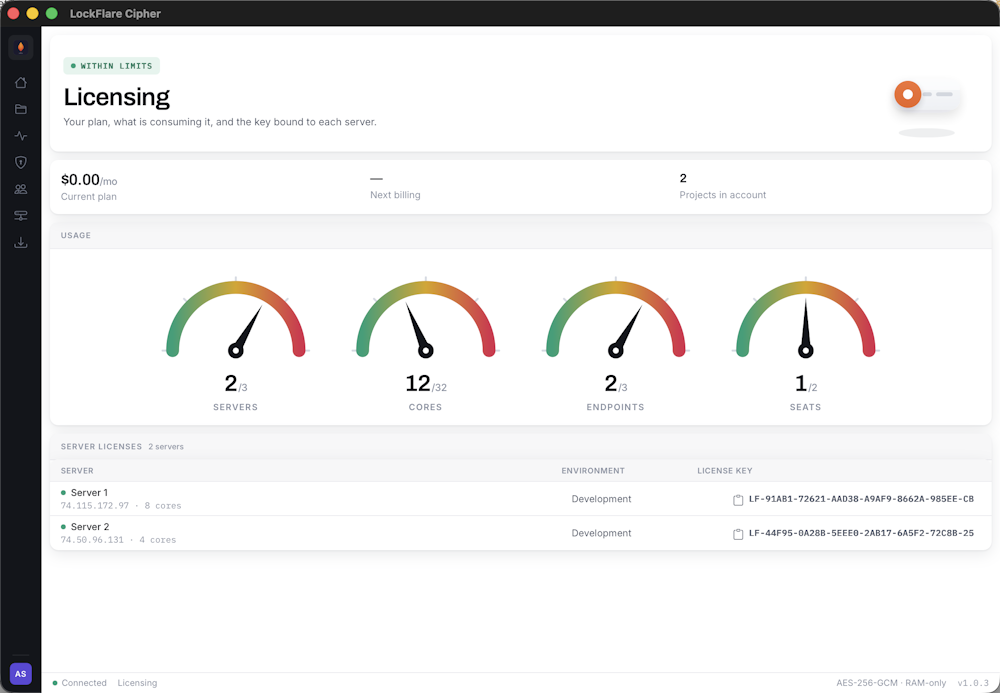
Every server’s key, on the Licensing screen. Click to copy.
You need this in a moment. It is the only thing tying the Engine on that machine to your account, and it will not work on a different IP.
3 · Download the Engine
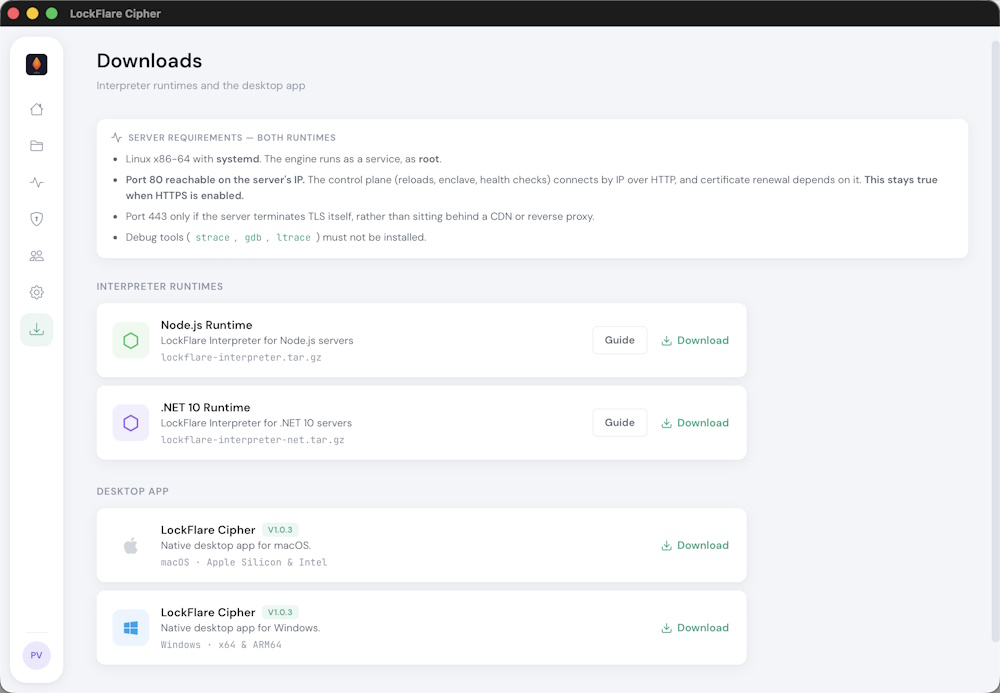
Two runtimes. Pick the one matching your project — a Node project needs the Node Engine.
Each card carries an Installation guide with the exact commands, including the Node.js or .NET prerequisites. The same content lives here: Node Engine and .NET Engine.
4 · Install it on the server
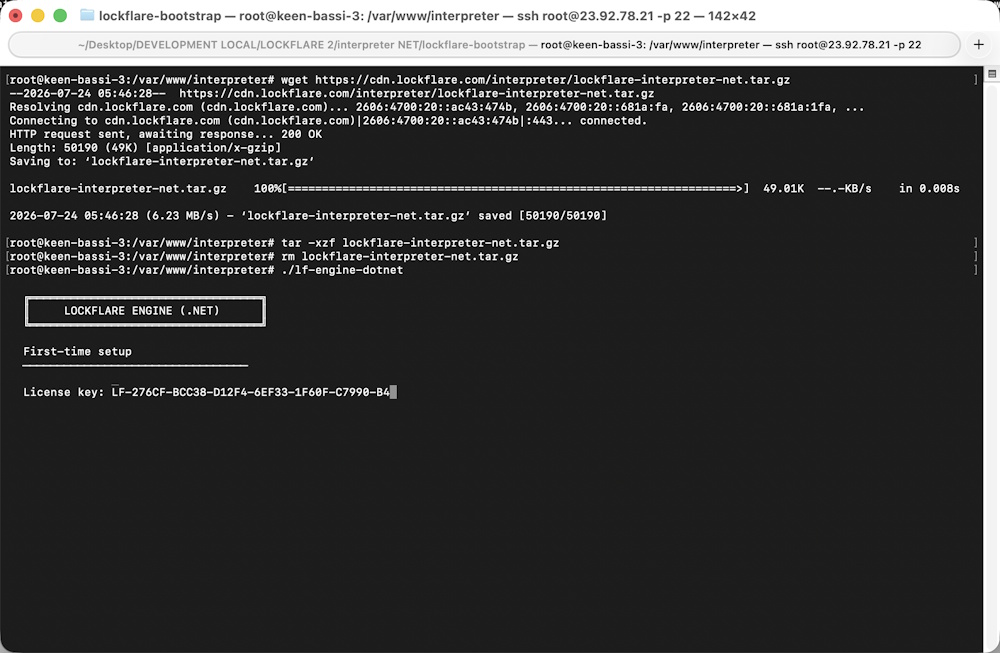
Extract the interpreter and start it once by hand.
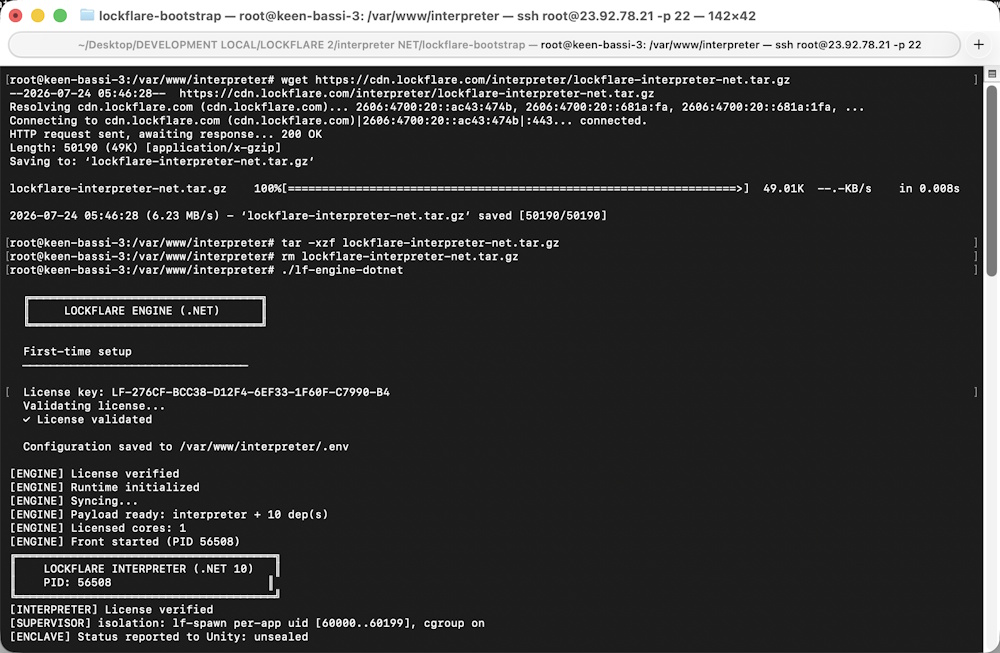
On first run it prompts for the licence key, validates it and writes it to .env.
Subsequent starts do not prompt.
5 · Make it a service
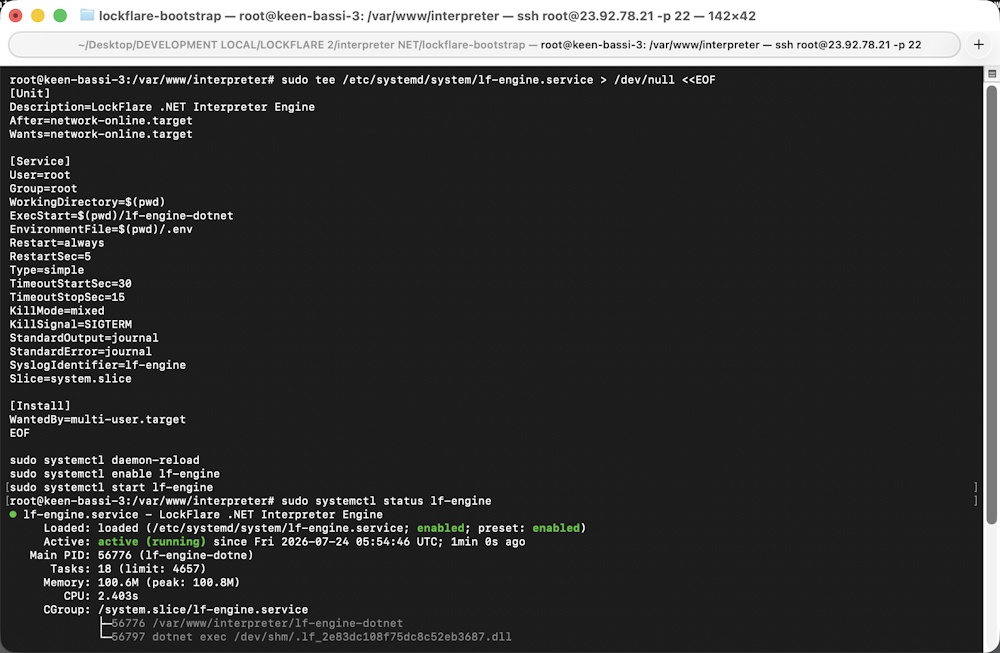
Install it under a service manager and confirm it is running.
Cores
Cores are what you licence, and you decide the split. A low-traffic site is fine on one; a busy API benefits from more. The allocation is changeable later without reinstalling anything.
The Licensing screen shows cores used against cores available as a live gauge, so you can see the headroom before you add a machine.
Replacing a server
Because a LockFlare server holds nothing but the Engine, replacing one is quick: register the new machine, install the Engine with its new licence, push. There is no state to migrate.
That is the whole point of keeping the box dedicated — and it stops being true the moment you put a database on it.